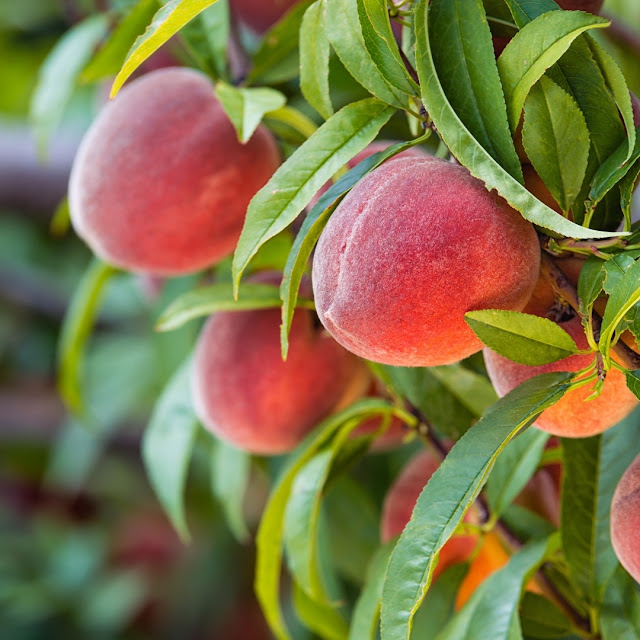
Jumat, 25 Februari 2022

Stone Fruit and Brown Rot Solutions

 PLANT DOCTOR

Brown Rot of Stone fruit

There’s plenty of cultivars of stone fruit trees that can fit into any size garden.

Trixie and Pixie dwarf nectarine and peach trees have been around for years.

“There’s even a nectarine tree classed as Super Dwarf called ‘ Peach Sunset” that is grafted onto super dwarfing rootstock to produce a more compact tree growing to around 1.5 m tall.
This Nectarine is self fertile so only one tree is needed.

  • But before we get too carried away, what are the cons for growing stone fruit?

  1. Is deciduous a con? Possibly, because stone fruit tree are deciduous so if you don't like the bare look in winter, stone fruit trees are not for you.
  2. Do you need two trees for fruit set? Not always so do your homework.
  3. Preventative spraying for peach leaf curl and  brown root of stone fruit may be needed.
Perhaps I'm preaching to the converted and you already grow stone fruit.
Also perhaps, like me, you've never had a delectable harvest stolen from under your nose due to a fungal disease.

Imagine this, ripe luscious fruit that you pick and place in your fruit bowl. A day later, the same fruit has inexplicably in part turned a mushy brown, soon to be consumed completely by the fungus.

Or you have bunches of fruit on your tree and some of the start dropping off or look like in the image, with a brown sunken fungal growth.
  • The bad news is, it's too late to do something about it now.
If you don’t want a repeat of those nasty surprise in your stone fruit, you have to be pro-active with preventative spraying in winter when the tree is leafless and dormant.
Spraying with sulphur at that time is a good go to all round spray.

You may even have to open the centre of established trees a bit more than usual to increase air flow.

Still, the fruit I ate off my trees this year were super delicious and well worth growing your own stone fruit trees.

For more tips listen to the podcast.
I'm talking with Steve Falcioni of www.ecoorganicgarden.com.au   
Let’s find out

If you have any questions you can email us Realworldgardener@gmail.com or write in to 2rrr, PO Box 644 Gladesville NSW 1675.

Rabu, 23 Februari 2022

Making an experimental V shaped electric guitar part 2/2


Tools and materials:

Metallic guitar pickup

Block plane

No4 hand plane

Chisel set

Jointer planer

Table saw

Bandsaw

Cordless drill

Rotary tool

Volume pot

Output jack

Control knob

Belt sander

Flat rasp

Round rasp

Flat file

Plunge router

Trim router

Angle grinder

Round file

Spoke shave

Forstner bit set

Soldering kit

Fret wire

Tune-o-matic Bridge & Tailpiece


In this video I complete the making of the DIY V shaped electric guitar I started on the previous video. 


Special thanks to:

a.) stewmac for the online fret calculator: https://www.stewmac.com/fret-calculator/

b.) www.seymourduncan.com for the wiring diagrams

Both sites are really helpful and I am really grateful for the info they provide. 


At this point I started making the cavities for the electronics. I used my router, chisels and forstner bits for the job. 


I then drilled the holes on the pickguard and installed the bridge. The bridge has some metal inserts but I didn’t have any so I placed it straight in the wood. Although this was not the proper way to do it. 


I then did some fine tunings on the pickguard and polished it. 


I coloured the guitar with water based dye. I first applied the red coat. Then I added the black. I used a wet rag to create the gradient effect ( sunburst ). I then finished the body with clear water based varnish. 


At this point I started shaping the neck with rasps, files and a spokeshave. 


I made the fretboard. My scale was 443mm from nut to nut. I used an online fret calculator to measure my fret positions. 


While the fretboard glue was drying I did all the soldering stuff. 


I trimmed the fretboard flush and started installing the frets. I trimmed them flush with a file and added a drop of glue from the sides. Then I levelled the frets and polished them. 


Finally I made the nut and bridge. And added the strings.


My little guitar was ready. It was a ton of fun to make. But that was it, see you soon with a new project video.


Disclosure: Some of the links below are affiliate links, meaning, that at no cost to you, I get a small commission if you click through and make a purchase.

Jumat, 18 Februari 2022

Making an experimental V shaped electric guitar part 1/2


Tools and materials:

Metallic guitar pickup

Block plane

No4 hand plane

Chisel set

Jointer planer

Table saw

Bandsaw

Cordless drill

Rotary tool

Volume pot

Output jack

Control knob

Belt sander

Flat rasp

Round rasp

Flat file

Plunge router

Trim router

Angle grinder

Round file

Spoke shave


In this video I begin to make a DIY V shaped electric guitar out of beech wood and metal.


I begun by making a full size template out of cardboard. 


I then planed my wood and cut it roughly n the bandsaw.


I then glued the body pars together. 


Next I sanded the body and added a round over with the router. 


Next I cut the basic shape of the neck. 


I routed out the neck joint on the body. I used a chisel and plane to make it fit right. 


Then I routed and chiseled the pickup pocket. 


Out of a sheet of metal I cut my metal parts with the angle grinder. I then fine tuned them with files. 


At this point I stopped. The build will continue and finish on the next video. 


I hope you liked it so far because that was it, see you soon with the next and final part. 


Disclosure: Some of the links below are affiliate links, meaning, that at no cost to you, I get a small commission if you click through and make a purchase.

Jumat, 11 Februari 2022

Tips for making wooden toys


Tools and materials I propose:

Scroll saw

Rotary tool

Hole saw

Cordless drill

Block plane

Plunge router

Pyrography Pen Wood Burning Kit

Buffing kit

Alcohol based markers

Lathe

Wood turning tools set

Chuck kit

Table saw

Drill press

Bandsaw


In this video I tried to show a few tips and tricks for DIY woodworkers who like to make toys.


In the video I show some simple and some more complicated stuff. You should keep what you need and what you feel is useful for your style of toy making.


I hope you found this video useful. See you soon with a new project video. 


Disclosure: Some of the links below are affiliate links, meaning, that at no cost to you, I get a small commission if you click through and make a purchase.

Jumat, 04 Februari 2022

How to start wood carving with hand tools


Tools and materials I propose:

Flexcut starter carving set

PFEIL Carving Set

Carving mallet

Tormek T8 Sharpening System

Tormek Hand Tool Sharpening Kit

Chisel set


I tried to make a video with all the basic information you need  in order to start wood carving with hand tools. 


In the video you’ll find information about tools and how to use them. 


You will also find information about sharpening the tools, various types of woods and information a bout the wood in general. 


I hope you’ll find the video useful. 


Disclosure: Some of the links below are affiliate links, meaning, that at no cost to you, I get a small commission if you click through and make a purchase.